All terrain standaard hoogte TF197
Beschrijving
TERRAFIRMA ALL TERRAIN standaard hoogte H/D SUSPENSION KIT 90 Suspension kit voor: Defender 90 , Defender 110 Defender 130, Discovery... verder lezen- Beschrijving
- Beoordelingen (0)
- Plaats review
Beschrijving
TERRAFIRMA ALL TERRAIN standaard hoogte H/D SUSPENSION KIT 90
Suspension kit voor:
- Defender 90 ,
- Defender 110
- Defender 130,
- Discovery 1
- Range Rover Classic.
1.Put the car into gear or park and apply the hand brake, loosen the front wheel nuts on one side, raise the
vehicle on a trolley or bottle jack under the axle and then support the vehicle with an axle stand under the
chassis. It’s easier and safer to do this job one side at a time.
2. Remove the front wheel.
3. Remove the plastic cover on the inner wheel arch and expose the top of the turret.
4. Undo the nut on the bottom of the shock absorber remove all bushes and washers.
5. Undo the 4 nuts securing the shock absorber turret to the chassis bracket then Pull the turret and shock
absorber out through the hole in the inner wing.
6. Undo the nut on the top of the shock absorber and then pull out of the turret removing all bushes and
washers.
7. Fit the new shock absorber in through the turret, with the new washers and bushes in the correct order, and
then tighten the top nut.
8. Gently lower the axle on the jack, the axle will lower the spring away from the chassis and the spring will
become loose. Once this happens stop lowering the axle. Take care not to stretch the brake lines.
9. Clean the spring plate on the axle and fit the new spring ensuring you use the correct spring for the side of
the vehicle you are changing as the springs are normally handed.
10. Gently raise the axle back up using the jack and ensuring the spring relocates into the top chassis mount.
11. Fit the new shock absorber in through the turret, with the new washers and bushes in the correct order, then
tighten the top nut.
12. Fit the upper bottom washers and bush, before pulling the lower part of the shock down through the spring
seat. Then fit the lower bottom washers and bush and the securing nut, Tighten the bottom securing nut.
13. Drop the turret and shock absorber back through the hole in the inner wing, fit the washers and nuts and
tighten down the turret onto the chassis bracket.
14. Refit the plastic inner wing cover.
15. Refit the wheel, lower the car off of the axle stand and torque the wheel nuts correctly.
16. Repeat the procedure on the other side.
17. Put the car into gear or park and apply the hand brake, loosen the rear wheel nuts on one side, raise the
vehicle on a trolley or bottle jack under the axle and then support the vehicle with an axle stand under the
chassis. It’s easier and safer to do this job one side at a time.
18. Remove the rear wheel
19. Undo the nut on the bottom of the shock absorber remove all bushes and washers.
20. Undo the nut on the top shock absorber chassis mount and then pull the shock absorber off of the mounting
removing all bushes and washers.
21. Undo the 2 bolts which hold the spring retaining plate in place.
22. Gently lower the axle on the jack, the axle will lower the spring away from the chassis and the spring will
become loose. Once this happens stop lowering the axle and remove the old spring
23. Clean the spring seat and retaining plate, fit the new spring, ensuring you use the correct spring for the side
of the vehicle you are changing as the springs are normally handed.
24. Refit the spring retaining plate tighten the bolts making sure the retaining plate is holding the spring tightly in
place.
25. Gently raise the axle back up using the jack and ensuring the spring relocates into the top chassis mount.
26. Fit the new shock over the top chassis mounting, with the new washers and bushes in the correct order and
the correct way around, the convex side of the curved washers must be against the rubber bush, and then
tighten the top nut.
27. Fit the upper bottom washers and bush, before pulling the lower part of the shock absorber down through the
axle mounting bracket *. Then fit the lower bottom washers and bush and the securing nut, Tighten the
bottom securing nut.
28. Refit the wheel, lower the car off of the axle stand and torque the wheel nuts correctly.
29. Repeat the procedure on the other side.
*NOTE – For long travel (+2” and longer) shocks it is an advantage to remove the metal bush cups
found on post 1994 Defenders and Discovery rear axles, this will allow unrestricted movement of the
lower shock mount.
Allowing the shock bush washers to contact the metal bush cup can cause premature shock failure
Beoordelingen (0)
Enkel ingelogde klanten die dit product gekocht hebben, kunnen een review schrijven.
- Er zijn nog geen reviews voor dit product.
Gerelateerde producten

BRC8089L Rivet
Discovery 1-2 €0,60 excl. BTW In winkelmand

deurslot reperatie set
Discovery 1-2 €6,25 excl. BTW In winkelmand

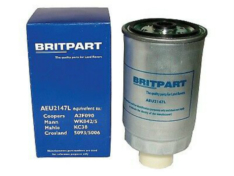
AEU2147L brandstof filter
Discovery 1-2 €5,05 excl. BTW In winkelmand

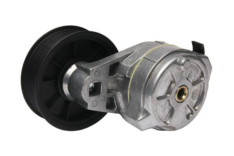
ERR6439 aandrijfriem spanner
Discovery 1-2 €70,00 excl. BTW In winkelmand
 Ons adres
  Email
Email  Telefoon
